
 Pin
Pin
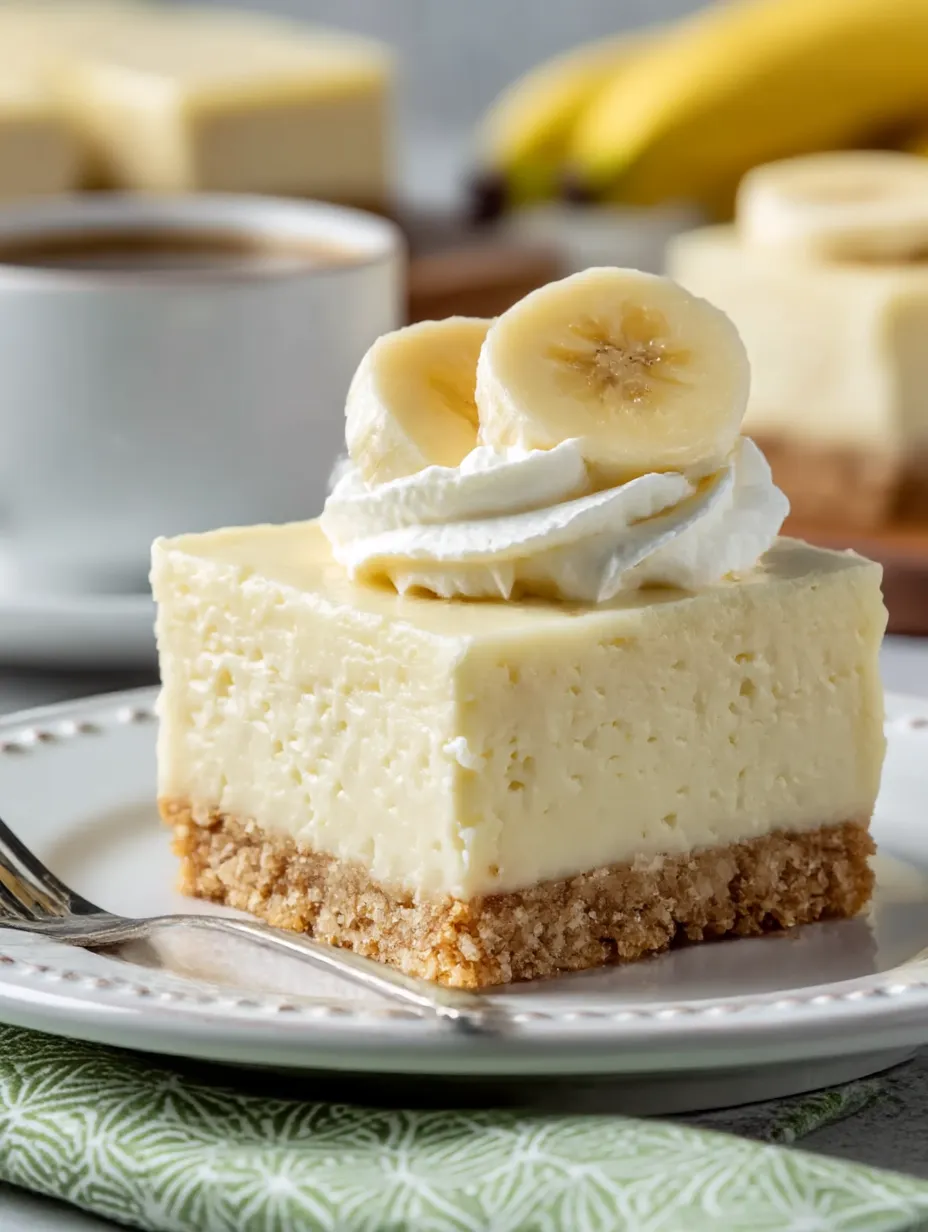
Banana Cream Cheesecake Bars are a dreamy dessert that combines all the comfort of banana pudding with the creamy decadence of cheesecake. With a buttery vanilla wafer crust and plush banana-infused filling, these chilled bars make a satisfying treat for any gathering or just to brighten up a regular day.
The first time I made this for a birthday, everyone raced for seconds before I even finished the coffee. Now it is my go-to make-ahead dessert for picnics and summer holidays.
Ingredients
- Nilla wafer cookies: They bring tenderness and a sweet vanilla backbone to the crust. Look for fresh, crisp cookies with no off smells
- Butter: The secret to a rich crust. Choose unsalted to control the saltiness and melt gently for blending
- Heavy whipping cream: This ingredient makes the filling irresistibly fluffy. Buy the freshest you can and keep it very cold before whipping
- Granulated sugar: For gentle sweetness throughout. Opt for fine white sugar for the smoothest cheesecake texture
- Cream cheese: It creates that signature tang and velvet mouthfeel. Pick full-fat blocks and make sure they are fully softened at room temperature to avoid lumps
- Instant banana cream pudding mix: Packs in natural banana flavor and helps the filling set. Use the classic Jell-O brand or your favorite equivalent
- Sliced bananas: To layer on top for a true banana dessert experience. Choose ripe but not overly soft bananas without brown spots
- Whipped topping: For garnish and a final flourish. Use homemade or your preferred ready-made style
Step-by-Step Instructions
- Create the Crust:
- Crush Nilla wafer cookies into sandy crumbs using a food processor or blender. Mix thoroughly with melted butter until all crumbs are evenly moistened
- Prepare the Pan:
- Line a nine by nine baking pan with parchment paper making sure it overhangs a bit for easy lifting later. Press the cookie mixture firmly and evenly into the bottom forming a compact crust. Move the pan to the freezer to set the crust while making the filling
- Whip the Cream:
- In a large chilled mixing bowl add cold heavy cream and sugar. Whip using a hand mixer or stand mixer until stiff peaks hold their shape when the beaters are lifted. Do not rush this step as the cream should be billowy and firm. Set aside when done
- Blend the Filling:
- In a separate bowl beat cream cheese until fluffy and smooth. Gradually add in banana pudding mixes making sure everything is unified and no lumps remain
- Combine Mixtures:
- Gently fold the whipped cream into the cream cheese and pudding base using a spatula. Turn and fold carefully until just integrated to maintain volume. Overmixing can deflate the lightness
- Assemble the Bars:
- Spoon and spread the cheesecake filling over the chilled crust in an even thick layer. Smooth the top with a spatula
- Chill Thoroughly:
- Cover the pan tightly with wrap or foil. Refrigerate for at least eight hours or let it set overnight for perfect slicing
- Serve and Garnish:
- Carefully lift the bars from the pan using the parchment paper. Cut into twelve even squares. Top each bar generously with whipped topping and slices of banana right before serving for best freshness
 Pin
Pin
Banana pudding mix gives an authentic banana flavor without mushy fruit which I love. My kids say this dessert tastes like summer afternoons at grandma’s and those nostalgic family memories make these bars extra special for me.
Storage Tips
Store leftover bars tightly covered in an airtight container in the refrigerator and they will keep fresh and flavorful for up to five days. If adding bananas on top store them separately to avoid browning
Ingredient Substitutions
Shortbread cookies or graham crackers can stand in for Nilla wafers if that is all you have. For a richer filling swap mascarpone for some cream cheese. Non-dairy whipped topping and plant-based butter make this dessert adaptable for everyone
Serving Suggestions
The bars are perfect on their own but you can drizzle caramel sauce or sprinkle toasted chopped nuts on top for an extra touch. They are delicious paired with fresh berries or served after grilled summer meals
Cultural Context
Banana pudding is a beloved classic across the American South and these bars are a modern spin that delivers the same comfort in a portable slice. Inspired by church potlucks and backyard cookouts these bars keep tradition alive with a twist
Recipe FAQs
- → How do I prevent the crust from crumbling?
Process the cookies into fine, even crumbs and mix thoroughly with melted butter so they hold together. Chill the crust before adding the filling to help it set firmly.
- → How long should the bars refrigerate for best results?
Chilling for at least 8 hours or overnight ensures the bars are fully set and easy to cut into neat squares.
- → Can I use a different cookie for the crust?
Yes, graham crackers or vanilla cookies work well if Nilla wafers aren't available. Adjust butter amounts as needed for binding.
- → How do I slice clean, neat bars?
Use a sharp knife dipped in hot water and wiped clean between cuts for tidy edges and minimal sticking.
- → How should leftovers be stored?
Store any remaining bars in an airtight container in the refrigerator for up to 4-5 days to maintain freshness and texture.