
 Pin
Pin
Get ready for the fluffiest homemade chocolate covered marshmallows that will delight everyone This recipe creates pillowy soft marshmallows dipped in a rich chocolate coating A batch is just begging to be slipped into a mug of hot chocolate or packaged for a heartfelt edible gift
Last winter I whipped these up on a snow day and they barely survived the afternoon My family claims they are the best marshmallows they have ever tasted and now we make them together every holiday season
Ingredients
- Unflavored gelatin packets: Essential for the classic marshmallow texture Choose a good quality brand for best results
- Cold water: Helps the gelatin bloom which is the base for the fluffy texture Always use fresh cold water when possible
- Sugar: Provides sweetness and structure Use pure cane sugar for a clean taste
- Light corn syrup: Keeps the sugar from crystallizing and ensures smooth glossy marshmallows Look for a clear bottle with no off colors
- Salt: Enhances the vanilla and chocolate flavors Use fine sea salt for the best distribution
- Vanilla extract: Adds aromatic flavor Choose real vanilla for the best taste
- Powdered sugar: Prevents marshmallows from sticking and gives them a delicate finish Sift before using to avoid lumps
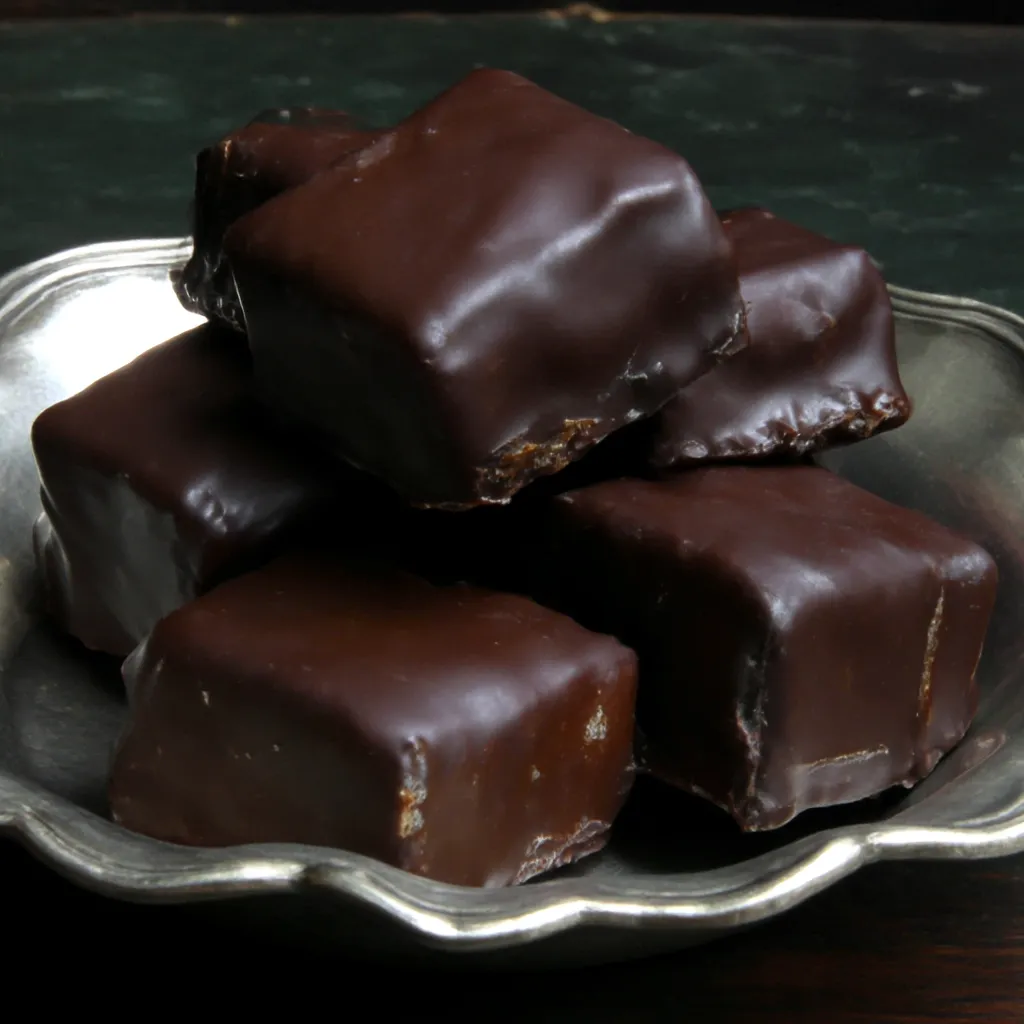
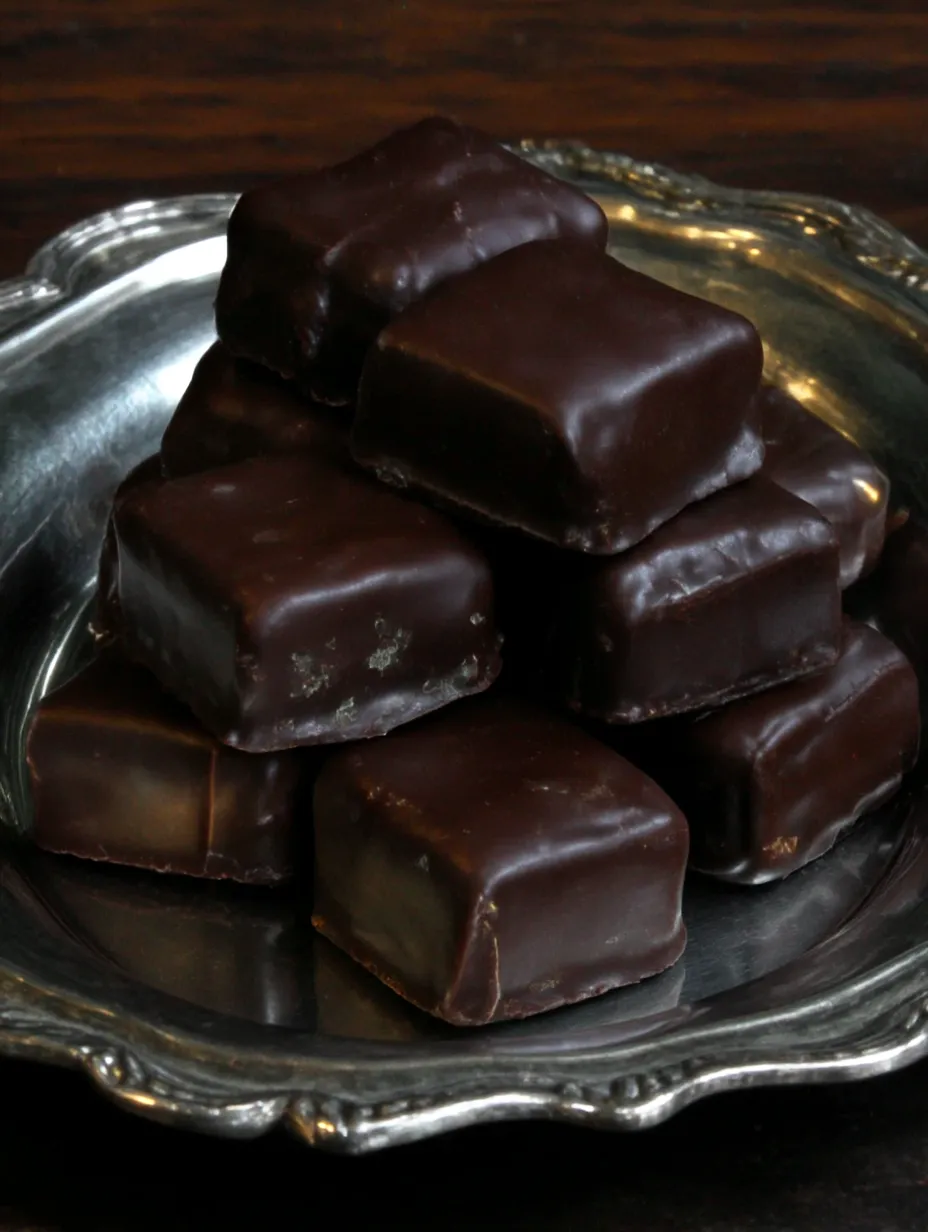
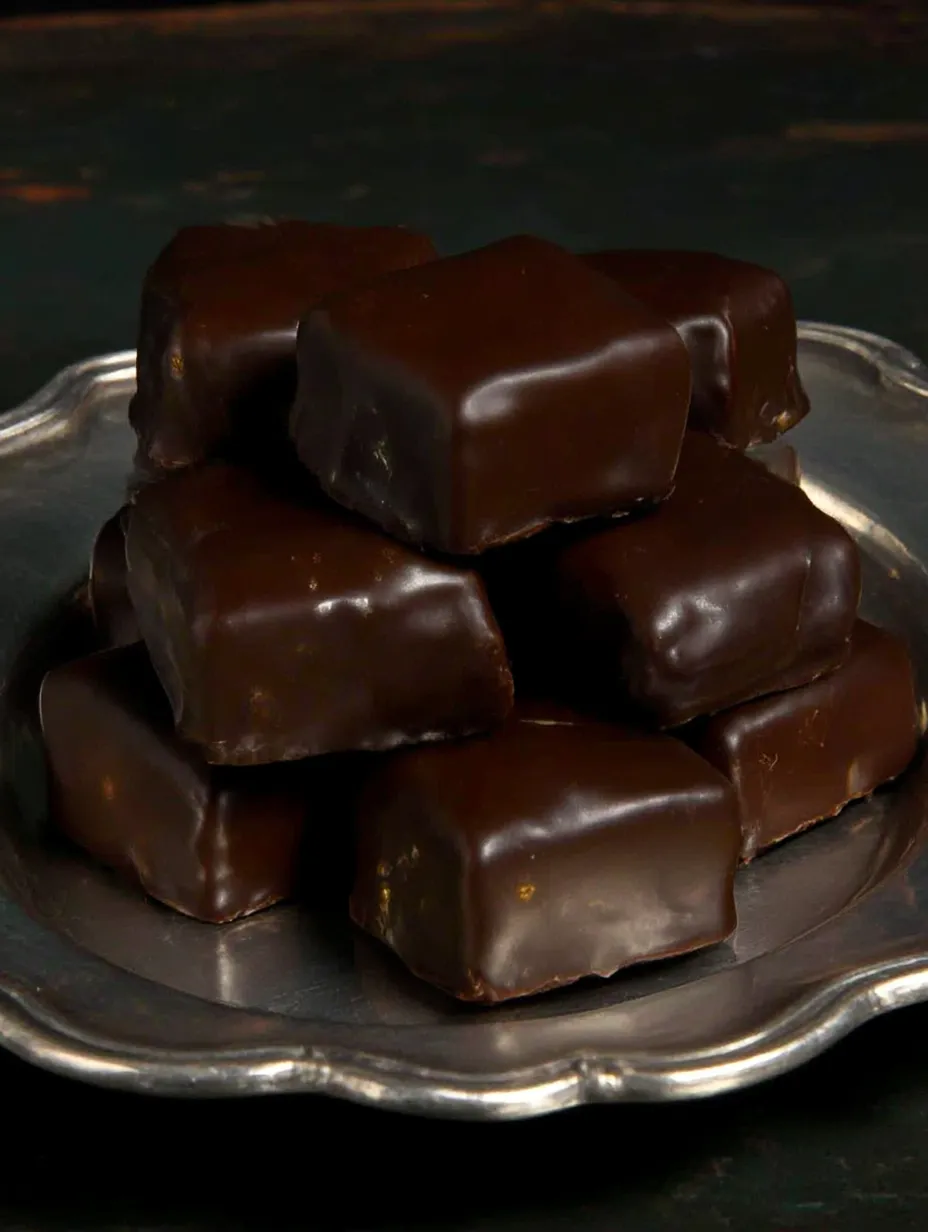
- Milk dark or semisweet chocolate or melting wafers: This is what you will dip the marshmallows in Pick a high quality chocolate for melting smooth and setting well
Step by Step Instructions
- Prepare the Pan:
- Lightly coat a 9 by 13 inch pan with nonstick spray and dust the inside evenly with powdered sugar This prevents sticking when you later remove the marshmallows
- Bloom the Gelatin:
- Sprinkle the unflavored gelatin over half a cup of cold water in your standing mixer bowl Let it sit until the gelatin absorbs the liquid and becomes sponge like This blooming step usually takes about ten minutes and is critical for the right texture
- Cook the Sugar Syrup:
- Combine the sugar corn syrup salt and a quarter cup of water in a heavy saucepan Heat gently until all the sugar is dissolved Gently swirl the pan to avoid burning Turn the heat to high and simmer until the syrup reaches exactly two hundred forty degrees on a candy thermometer This is the soft ball stage and is important for chewy but fluffy marshmallows
- Whip the Marshmallow Base:
- With your mixer on low carefully pour the molten sugar syrup into the bloomed gelatin Begin mixing on low to avoid spatter then gradually increase to high speed Beat the mixture until it triples in volume and turns very fluffy and white This usually takes from eight to twelve minutes Beat in the vanilla during the last minute of mixing
- Spread and Set:
- Coat a rubber spatula with nonstick spray and pour the thick marshmallow batter into your prepared pan Smooth the top gently Cover with a piece of plastic wrap sprayed with nonstick spray and lightly press it onto the surface Let set at room temperature for several hours or overnight to fully firm up
- Cutting and Dusting:
- Once set lift the giant marshmallow from the pan onto a surface dusted with powdered sugar Use a sharp knife or scissors to cut into squares Dust all sides with more powdered sugar only if you plan to eat them plain
- Melt the Chocolate:
- Carefully melt your chosen chocolate in a microwave safe bowl in short bursts or over a double boiler Stir until completely smooth and glossy
- Dip and Finish:
- Dip each marshmallow square into the melted chocolate and use a fork to help coat it completely Lift and gently shake to remove excess chocolate Place on parchment or a silicone baking mat and let the coating set at room temperature until firm
 Pin
Pin
My favorite part is always the vanilla I use a robust vanilla for depth and even swirl in a bit extra sometimes When I was a child my grandmother would let me drizzle leftover melted chocolate onto any broken bits just for me
How to Store Chocolate Covered Marshmallows
Keep them in a single layer in an airtight container at cool room temperature If it is very warm outside place in the refrigerator but let sit at room temperature to soften before serving A sheet of parchment between layers keeps them from sticking You can also freeze them just be sure they are in a well sealed container and allow them to thaw uncovered to avoid condensation
Easiest Ingredient Swaps
For the chocolate try using melting wafers if you want a super smooth finish Flavored extracts like peppermint or almond create seasonal marshmallows For a deeper flavor sub half the corn syrup with honey and enjoy a floral undertone
 Pin
Pin
Perfect For Gifting and Special Occasions
Wrap marshmallows in cellophane bags tied with ribbon for holiday gifts Great for birthday treat bags or served alongside coffee at brunch For an even fancier presentation toss the dipped marshmallows in a plate of crushed nuts or sprinkles before the chocolate sets
A Little History
Marshmallows originated from medicinal confections using the marshmallow plant but modern recipes rely on gelatin for their signature airy chew Covering them in chocolate is a tradition dating to the early candy shops and is still a beloved treat especially in homemade form
Recipe FAQs
- → What type of chocolate is best for coating marshmallows?
You can use milk, dark, or semi-sweet chocolate. Melting wafers ensure a smoother coating but quality bars work well too. Melt slowly to avoid burning.
- → How do I keep homemade marshmallows fluffy and soft?
Beat the mixture until light and airy, and allow proper setting time at room temperature. Store in an airtight container to retain softness.
- → Can I use different flavors for the marshmallows?
Absolutely! Vanilla is classic, but try almond, peppermint, or coconut extracts for variety. Add after beating the mixture to incorporate.
- → What is the best way to melt chocolate for dipping?
Melt chocolate gently in a double boiler or use a microwave in short bursts, stirring between intervals, to prevent scorching.
- → How should I store chocolate covered marshmallows?
After chocolate sets, keep them in an airtight container at cool room temperature for up to a week to maintain freshness.