
 Pin
Pin
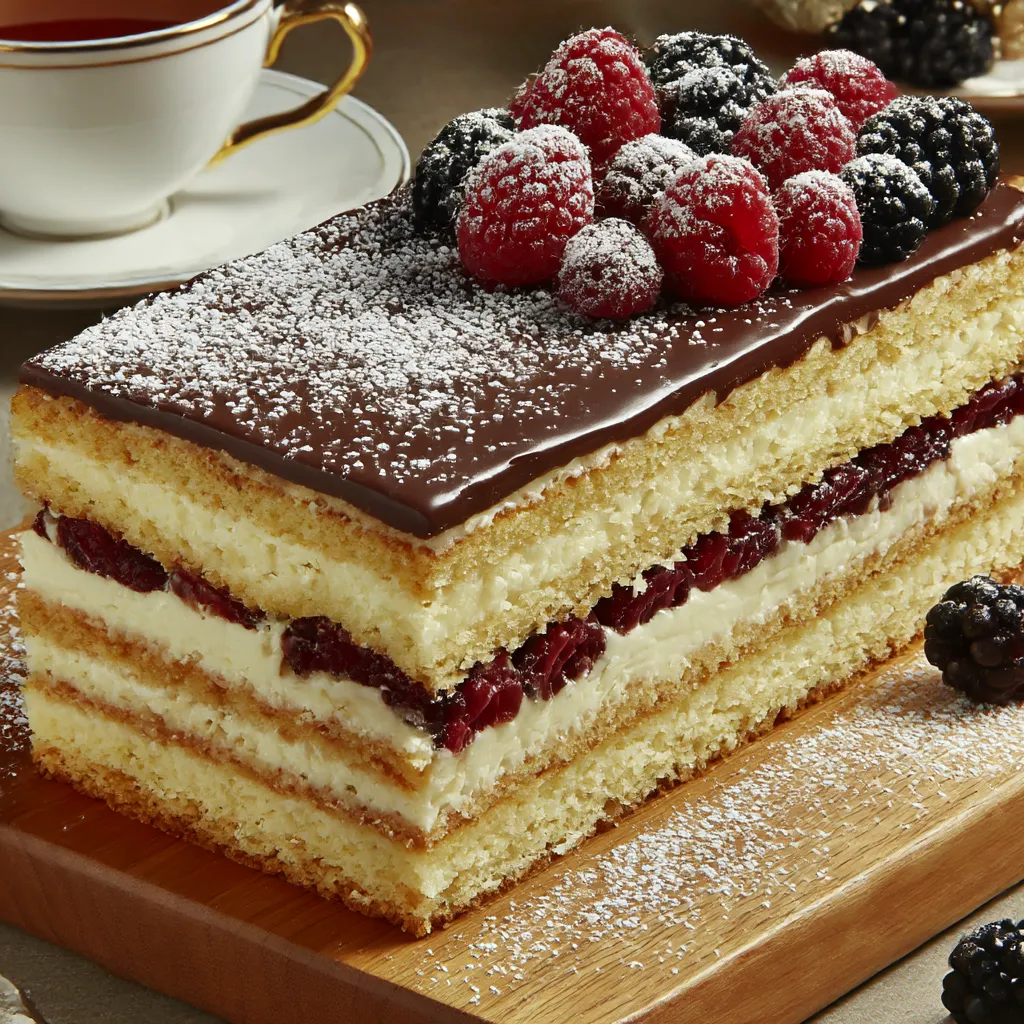
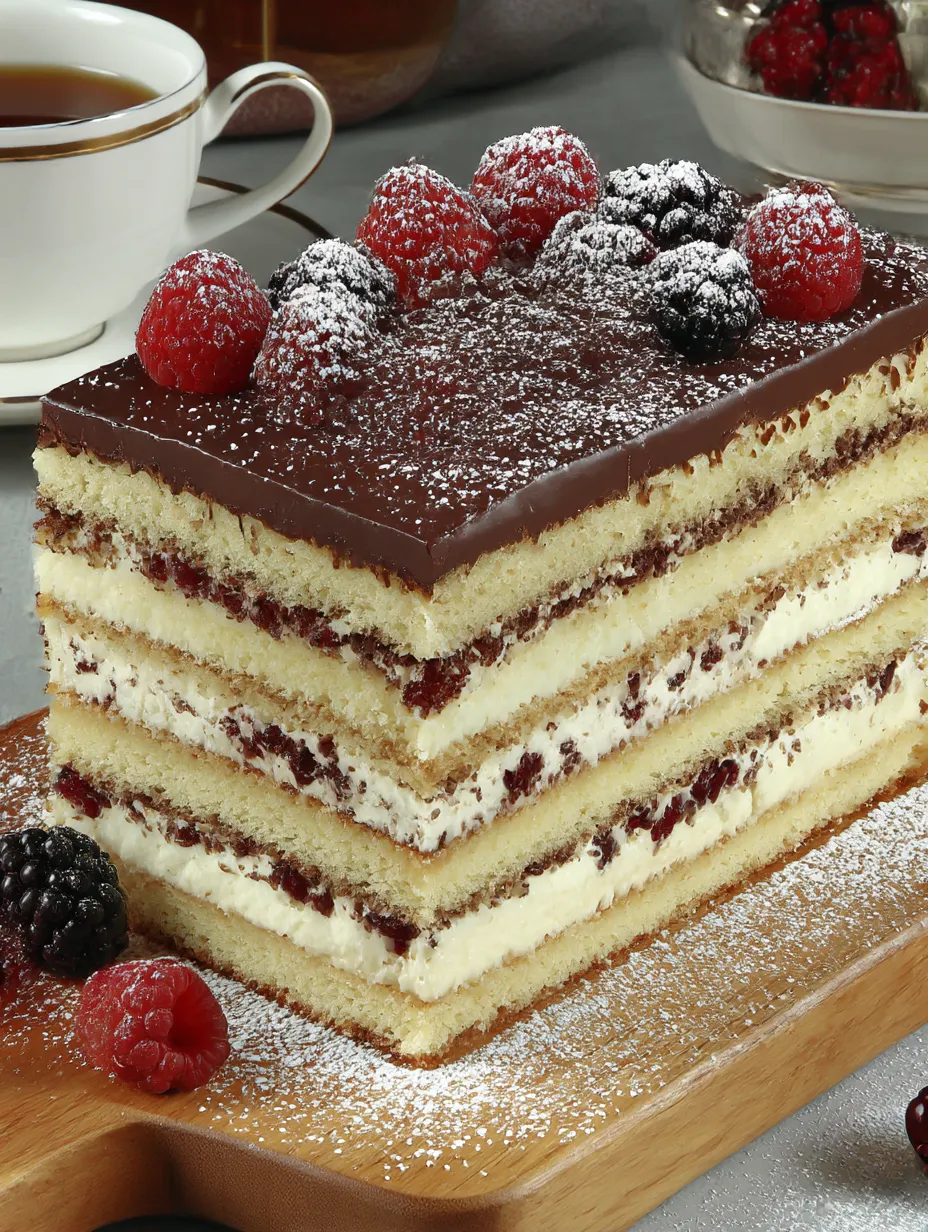
This Chocolate Custard Layered Cake has quickly become my go-to when I want to create something beautiful and truly decadent for a celebration. The airy chocolate sponge cake pairs with a silky vanilla custard and is finished with a shiny chocolate glaze. It is one of those desserts that looks impressive but is simple enough to make at home for any chocolate lover.
My first attempt at this cake was for my parents’ anniversary and it completely stole the show. My friends often ask for it after dinner parties and it has a nostalgic homemade bakery vibe I love.
Ingredients
- Egg whites: create a light sponge texture Use eggs at room temperature for easier whipping
- Sugar: adds sweetness and stabilizes the egg whites Fine granulated sugar dissolves best
- Wheat flour: keeps the sponge soft Opt for unbleached and fresh flour
- Baking powder: gives a gentle lift Fresh powder guarantees a fluffier cake layer
- Chocolate with 68 percent cocoa: makes the cake rich A good-quality bar melts smoothly
- Salt: brings balance and deepens flavor Use a pinch of fine sea salt
- Egg yolks: provide a creamy base for the custard Fresh yolks give a golden color and richness
- More sugar for the custard: Adjust the amount to your sweetness preference
- Milk: is used for both soaking and custard Whole milk gives the best creamy texture
- Cornstarch: thickens the custard and makes it sliceable Sift before using for lump free custard
- Vanilla sugar: adds aroma and classic flavor Good vanilla makes a difference
- Butter: enriches the custard and glaze Use a high fat content for the smoothest result
- Extra chocolate and milk for the glaze: Choose the same chocolate used in the sponge for harmony
Step-by-Step Instructions
- Make the Chocolate Sponge:
- Preheat your oven to 350 degrees Fahrenheit and line a large baking tray with parchment to keep the cake from sticking. Separate the eggs carefully and ensure the whites are free of any yolk. Beat the egg whites with a pinch of salt using a stand mixer or electric hand mixer on medium until soft peaks form. Gradually pour in the sugar and continue beating until the mixture holds stiff glossy peaks when you lift the beaters. While beating the whites melt your chocolate using short bursts in the microwave or over a double boiler just until smooth then let it cool so it does not cook the egg whites. Gently fold the cooled melted chocolate into the whipped egg whites being careful not to lose the airy texture. Sift in the flour and baking powder directly over the bowl to avoid lumps then fold gently until only just combined. Pour the batter onto the prepared tray and use an offset spatula to spread it in an even layer. Bake for about 8 minutes until a skewer comes out clean but do not overbake or the sponge will be dry. Cool the cake completely in the tray before removing it from the parchment.
- Prepare the Custard:
- Using a clean bowl whisk together all your egg yolks sugar and cornstarch until there are no lumps and the mix is pale. Gently heat the milk in a saucepan until warm but not boiling stirring so it does not scorch. Slowly whisk the warm milk into the egg yolk mixture a little at a time to temper it and avoid scrambling the eggs. Pour everything back into the saucepan and cook over medium heat stirring constantly with a spatula or whisk making sure to scrape the bottom until thickened to a custard consistency. Take off the heat and immediately stir in vanilla sugar and cubes of cold butter stirring until the custard is smooth and glossy. Set aside to cool completely which will help it set up for spreading.
- Layer the Cake:
- Once the sponge is cool remove it from the tray and carefully slice it in half horizontally to create two even rectangles. Place the first layer of sponge on your tray and brush or drizzle half of the reserved milk evenly to moisten. Spread half the cooled custard in an even thick layer right to the edges. Top with the second layer of sponge and repeat this step using the rest of the milk and custard smoothing the top with a spatula.
- Make the Chocolate Glaze:
- Combine the chocolate butter and milk in a small saucepan and warm gently over low heat stirring until melted and shiny. Let cool a bit before pouring so it will not melt the custard underneath. Pour the glaze evenly over the cake spreading with a spatula for a smooth glossy finish.
- Chill and Serve:
- Place the whole cake in the refrigerator uncovered for at least two hours so the layers firm up and the glaze sets. When ready to serve slice into neat squares using a hot knife wiping clean between cuts for perfect edges. Garnish with chocolate shavings or cocoa powder if desired.
 Pin
Pin
My favorite part of this cake is swirling the glossy chocolate glaze on top with my daughter who always wants to help. The smell when you slice it brings me right back to holidays in my childhood kitchen.
Storage Tips
Keep the cake chilled in the refrigerator covered for up to three days and bring out single slices to let them sit for a few minutes at room temperature before serving for the best texture. If you need to store it longer individual squares can be wrapped and frozen for up to two weeks though the custard will soften a bit after thawing.
Ingredient Substitutions
You can use gluten free flour blend instead of wheat flour if needed. If you are out of cornstarch potato starch works for the custard. Bittersweet or semi sweet chocolate can be swapped in for a different intensity just use a type you enjoy for snacking.
Serving Suggestions
This cake is already stunning on its own but it is especially nice served with a few fresh berries or a small dollop of whipped cream on the side. For extra elegance sprinkle the top with freeze dried raspberry powder or edible flower petals just before serving.
A Bit of History
Layered custard cakes are traditional desserts throughout Central Europe and this version is inspired by classic bakery cakes I remember trying on childhood trips. Serving homemade custard between soft cake is a nostalgic treat that never goes out of style.
Recipe FAQs
- → How do I achieve a fluffy chocolate sponge?
Beating the egg whites until stiff peaks form and gently folding in the flour and melted chocolate help to keep the batter airy.
- → Can the custard filling be made ahead?
Yes, the vanilla custard can be prepared a day in advance and stored refrigerated until ready to assemble the cake.
- → What chocolate works best for the glaze?
High-quality dark chocolate around 68% cocoa provides a rich flavor and glossy finish for the glaze.
- → How long should the cake chill before serving?
The cake should be refrigerated for at least 2 hours after glazing, ensuring the layers set and flavors meld.
- → How should leftovers be stored?
Keep leftovers covered and refrigerated to maintain freshness and prevent the custard from becoming too soft.
- → Can I add garnishes to this cake?
Absolutely—fresh berries, chocolate shavings, or a dusting of cocoa powder make elegant finishing touches.