
 Pin
Pin
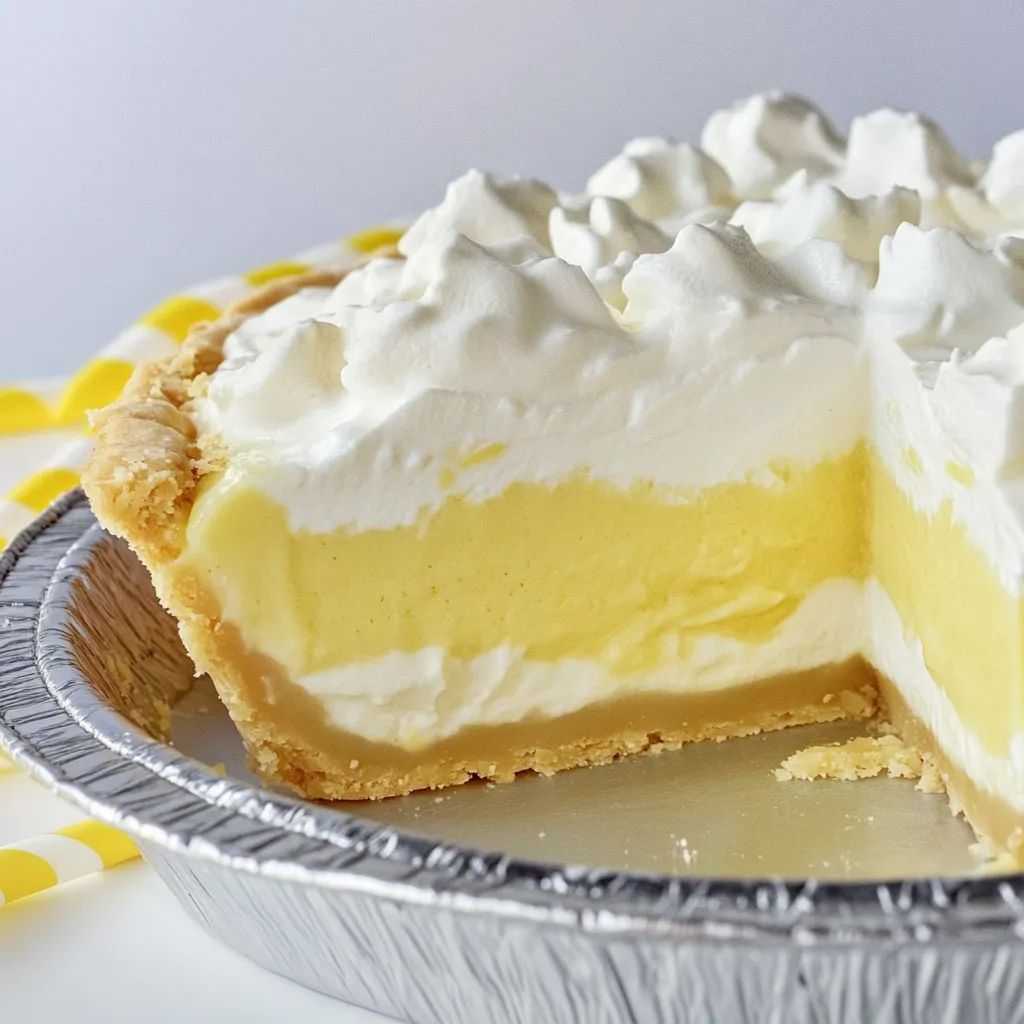
This no-bake lemon cheesecake pie has been my summertime secret weapon for years, combining the perfect balance of creamy tanginess with refreshing lemon flavor in every bite. The layered approach creates a beautiful gradient of lemon intensity that makes this dessert both visually stunning and incredibly delicious.
I first made this pie for a backyard barbecue when the temperatures hit triple digits and turning on the oven seemed criminal. It disappeared so quickly that I now make two whenever company comes over.
Ingredients
- Graham cracker or Nilla Wafer crust: Ready to use for the perfect buttery base without any work
- Lemon instant pudding mix: Provides concentrated lemon flavor without needing fresh juice
- Half and half: Creates a richer pudding than using regular milk would
- Cream cheese: Softened for that classic cheesecake tang and creamy texture
- Granulated sugar: Balances the tartness of the lemon and cream cheese
- Cool Whip: Creates airy lightness that makes this dessert irresistible
- Fresh lemon slices: Optional for garnish but adds a beautiful finishing touch
Step-by-Step Instructions
- Prepare the Pudding Base:
- Whisk together the pudding mix and half and half until completely combined, about 1-2 minutes of vigorous whisking. Allow the mixture to sit for a few minutes until it thickens to a spreadable consistency. Once thickened, measure out 1 1/2 cups and spread it evenly into the bottom of your prepared pie crust. This creates your intensely flavored foundation layer.
- Create the Cream Cheese Mixture:
- In a separate bowl, beat the softened cream cheese and sugar together until completely smooth and free of any lumps. The mixture should be light and fluffy. Gently fold in the Cool Whip using a spatula with a light hand to maintain the airy texture. This careful folding technique prevents deflating the mixture which keeps your pie light and mousse like.
- Assemble the Middle Layer:
- Take half of your cream cheese and Cool Whip mixture and combine it with the remaining lemon pudding. This creates a lighter lemon layer with a beautiful pale yellow color. Spread this mixture carefully over the first pudding layer in the pie crust, creating distinct layers that will be visible when sliced.
- Top with Final Layer:
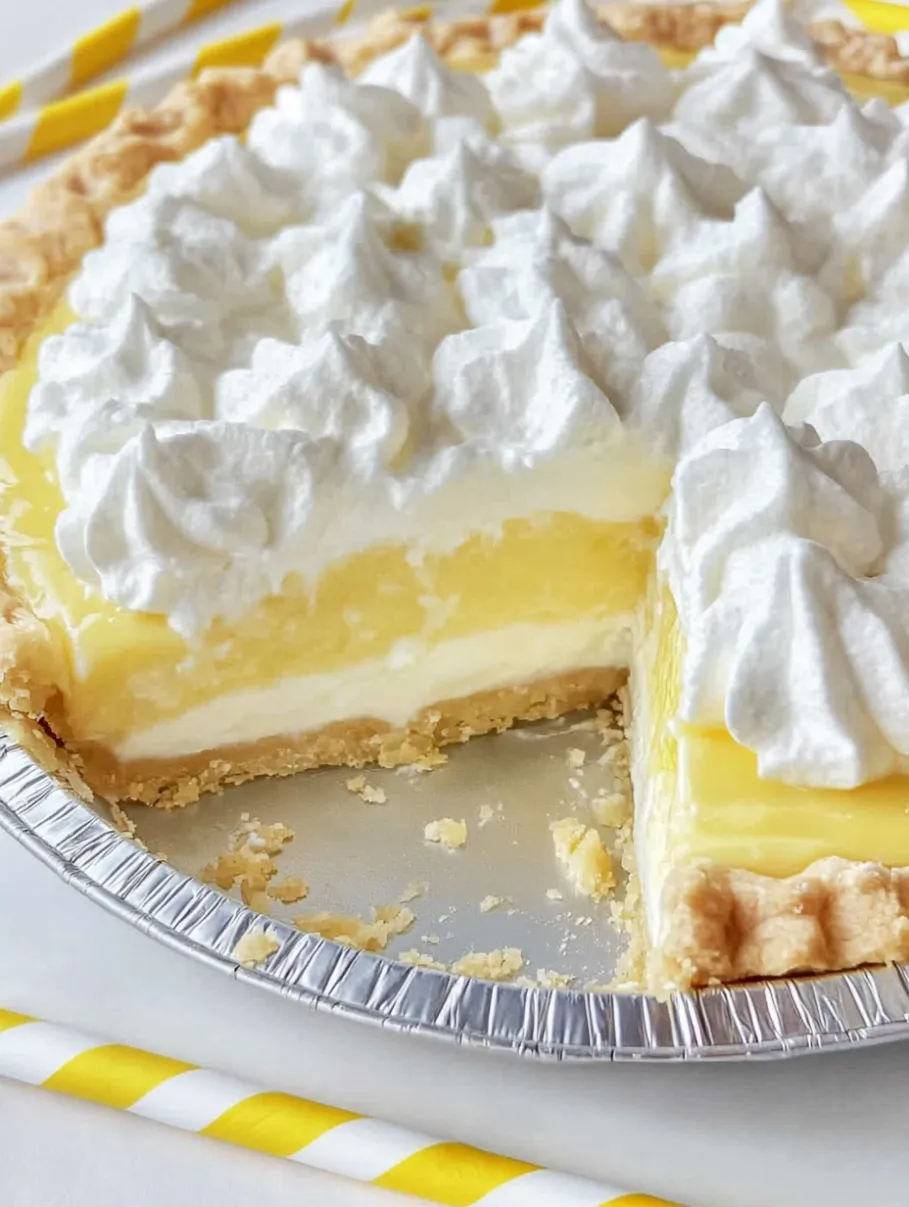
- Either spread the remaining cream cheese and Cool Whip mixture across the top of the pie for a smooth finish, or transfer it to a piping bag fitted with a decorative tip to create a more elegant presentation. The white topping creates a beautiful contrast against the yellow layers beneath.
- Chill Thoroughly:
- Refrigerate the pie for at least 6-8 hours, though overnight is best. This extended chilling time allows all the flavors to meld together while also helping the pie set to the perfect sliceable consistency.
 Pin
Pin
My favorite part of this recipe is watching guests eyes light up when they take their first bite. The contrast between the intense lemon base and the cloud like topping creates such a delightful experience that people never guess how simple it was to make.
Perfect Texture Tips
The key to this cheesecake pie is allowing enough time for it to set properly in the refrigerator. While it might be tempting to slice into it earlier, patience truly rewards you with the perfect creamy yet sliceable texture. The layers become more distinct and the flavors more harmonious with proper chilling time. I like to make this dessert first thing in the morning if I plan to serve it that evening, or better yet, the night before.
Smart Substitutions
This recipe is wonderfully adaptable to different flavor preferences. Try using lime pudding mix instead of lemon for a key lime version. For chocolate lovers, chocolate pudding with a chocolate cookie crust creates an entirely different but equally delicious dessert. You can also substitute neufchâtel cheese for the cream cheese to reduce the fat content slightly without sacrificing the creamy texture.
Elegant Serving Ideas
To elevate this simple dessert for special occasions, consider adding a garnish of candied lemon slices instead of fresh ones. A light dusting of powdered sugar gives it a bakery quality finish. For dinner parties, serve small slices with a dollop of lightly sweetened whipped cream and a small sprig of fresh mint. Individual servings in small jars or glasses create a stunning presentation for buffet style gatherings.
Storage Success
This cheesecake pie maintains its quality for up to 4 days when stored properly in the refrigerator. Cover it loosely with plastic wrap rather than aluminum foil, which can stick to the top layer. The crust may soften slightly over time, but many people find this adds to the appeal. While freezing is possible, the texture of the Cool Whip layer can change upon thawing, so I recommend enjoying it fresh from the refrigerator for the best experience.
Recipe FAQs
- → Can I use a homemade crust instead?
Yes, you can use a homemade cookie or graham cracker crust to add a personal touch to this no bake dessert.
- → Can I substitute Cool Whip?
Yes, you can substitute Cool Whip with homemade whipped cream for a fresher option. Simply whip heavy cream with sugar to stiff peaks.
- → How long should the pie chill?
It's best to refrigerate the pie overnight or at least 6-8 hours to ensure it firms up and the flavors meld together.
- → Can I use a different flavor instead of lemon?
Absolutely! Feel free to replace the instant lemon pudding with other flavors like vanilla or chocolate for variety.
- → How should I store leftovers?
Store leftovers in the refrigerator, covered, for up to 3 days to maintain freshness and texture.