
 Save
Save
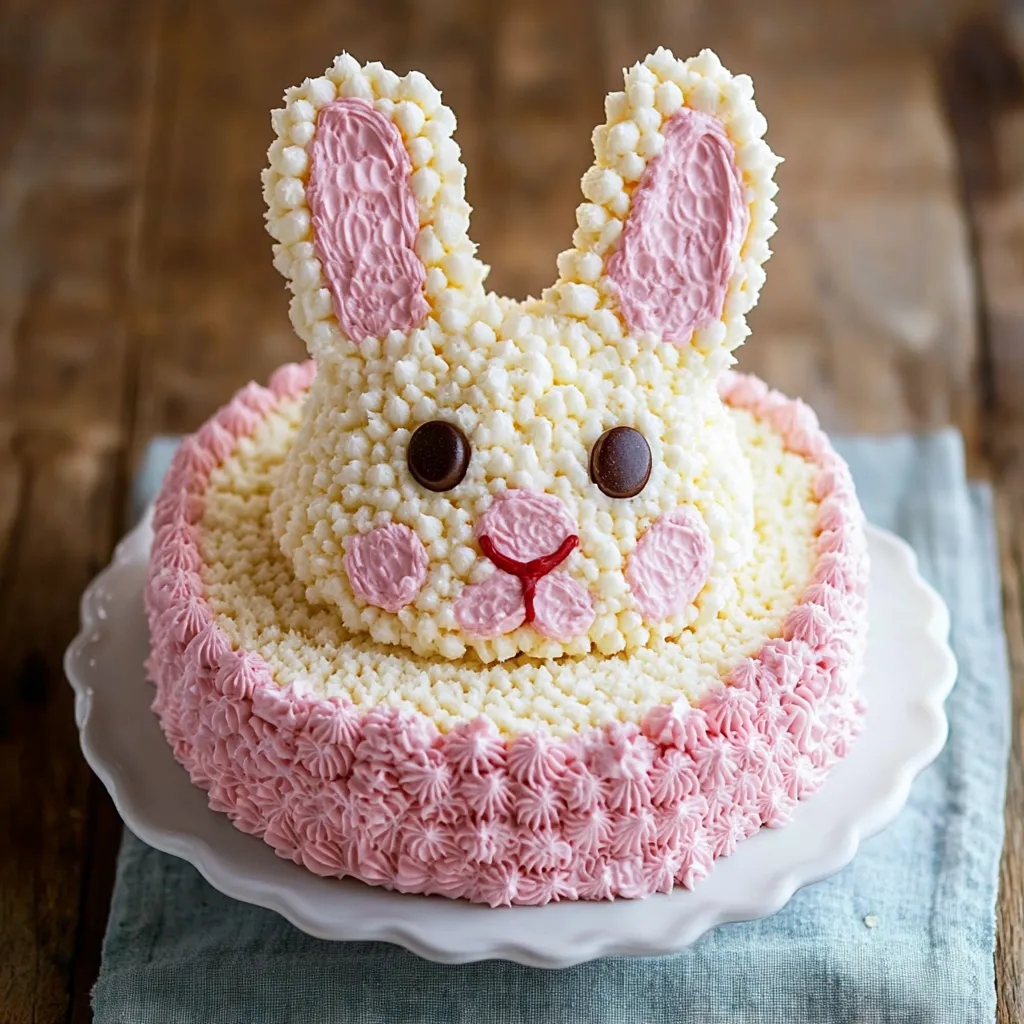
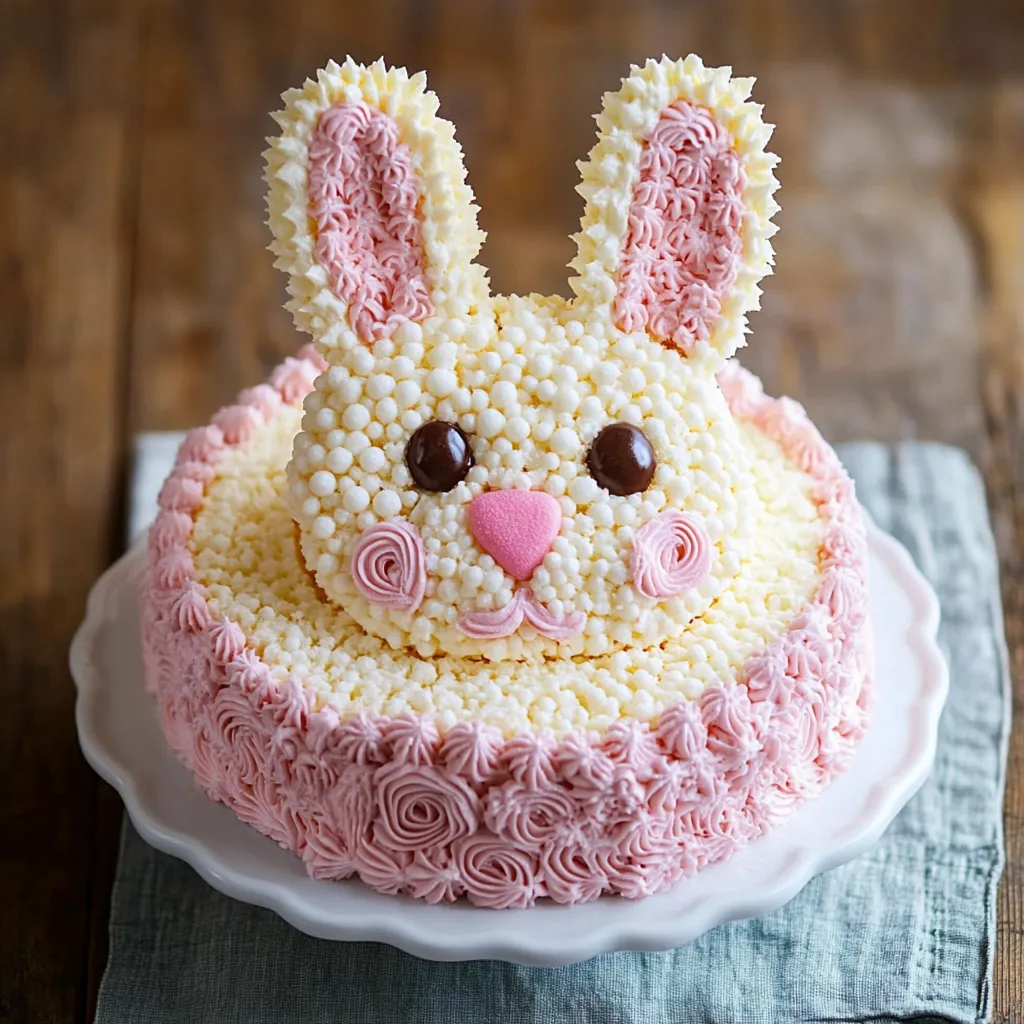
This beginner-friendly Easter bunny cake transforms simple round cakes into an adorable holiday centerpiece that will delight family and friends. The star fill technique creates a textured finish that hides imperfections making it perfect for those new to cake decorating.
I first made this bunny cake with my daughter when she was just learning to bake. Despite her wobbly piping, the star fill technique made it look professional and she was so proud to show it off at our Easter gathering.
Ingredients
- Standard cake mix: Prepared as two 8 inch rounds gives you flexibility to use whatever flavor your family loves
- Unsalted butter: At room temperature ensures a smooth frosting that pipes beautifully
- Powdered sugar: Sifted if possible creates silky buttercream without lumps
- Vanilla and almond extracts: Combine for a classic sweet flavor that enhances any cake type
- Food coloring: In various shades allows creative customization for your bunny design
- Sprinkles or additional decorations: Add personality and extra festive touch
Step-by-Step Instructions
- Prepare the Cake Pieces:
- Bake your cake according to package directions for two 8 inch rounds. Once completely cooled take one cake round and make two simple cuts to create the ears and bowtie pieces. Arrange these pieces with the uncut round to form the bunny shape on your serving board. The intact round becomes the face while the cut pieces form the ears and bowtie.
- Make the Buttercream:
- Beat room temperature butter until creamy and pale about 3 minutes. Gradually add powdered sugar one cup at a time mixing well between additions. Add the vanilla extract almond extract and salt then mix until combined. Add milk or cream a little at a time until you reach a consistency that will hold shape when piped but isn't too stiff to work with.
- Prepare the Frosting Colors:
- Separate a small portion about 1/3 cup of frosting into a bowl and color it brown or black for the facial features. In separate bowls prepare pink frosting for the inner ears and nose and any other colors you want for decorating the bowtie. Keep the majority of the frosting white for the bunny's face and outer ears.
- Pipe the Facial Features:
- Using a small round tip pipe the eyes mouth and whiskers with the black or brown frosting. Take your time with this step as these details bring your bunny to life. Use a toothpick to lightly sketch where these features should go before piping.
- Create the Textured Fur:
- Fill a piping bag fitted with a star tip with white frosting. Hold the bag perpendicular to the cake and squeeze to create small stars covering the face and outer ear areas. The stars should touch each other creating a continuous textured surface that resembles fluffy fur.
- Add the Pink Details:
- Use your pink frosting with the same star tip to fill in the inner ears and nose. The contrast between the white and pink creates dimension and brings character to your bunny design.
- Decorate the Bowtie:
- Use your chosen color for the bowtie with the star piping technique to cover this section. Consider adding a contrasting center or decorative sprinkles to make this element stand out.
My favorite part of making this bunny cake is seeing children's reactions when they realize the simple round cakes have transformed into a character. The magic moment happened with my niece who gasped and said it was too cute to eat though she quickly changed her mind after the first slice.
Make Ahead Options
This bunny cake can be prepared up to two days in advance if stored properly. Bake the cake layers cool them completely then wrap tightly in plastic wrap. Store at room temperature for one day or refrigerate for up to three days. The buttercream can also be made ahead and refrigerated in an airtight container. Bring to room temperature and rewhip before using for the best piping consistency.
Flavor Variations
While vanilla cake with vanilla buttercream is classic for Easter you can customize this bunny cake with different flavor combinations. Try lemon cake with raspberry filling carrot cake with cream cheese frosting or chocolate cake with peanut butter buttercream. The design remains the same while the flavor profile can reflect your family's favorites or complement other dishes in your Easter menu.
Troubleshooting Tips
If your frosting becomes too soft while working especially during warm weather place the piping bag in the refrigerator for 5 to 10 minutes to firm up. Should your cake layers break when cutting or moving don't panic. The star piping technique will cover most imperfections and frosting can act like glue to hold pieces together. Remember that buttercream dries and forms a crust over time so complete your decorating in one session for the most cohesive look.
Recipe FAQs
- → What size cake pans should I use?
Use two 8-inch round cake pans for the layers. They should be fully cooled before cutting and assembling.
- → Can I use a different frosting technique?
Yes, while this uses the star frosting method, you can opt for smooth spreading or other designs depending on your preference.
- → What type of decorations work best?
Sprinkles, colored frosting, or candy decorations are great options to add charm and personality to your bunny cake.
- → How do I create the bunny's face details?
Use a pastry bag with a small round writing tip to pipe the facial features, such as the nose and eyes, with black or brown frosting.
- → Can I make this cake in advance?
Yes, you can bake the cake layers ahead of time and store them airtight. Assemble and frost the cake closer to serving time.