
 Save
Save
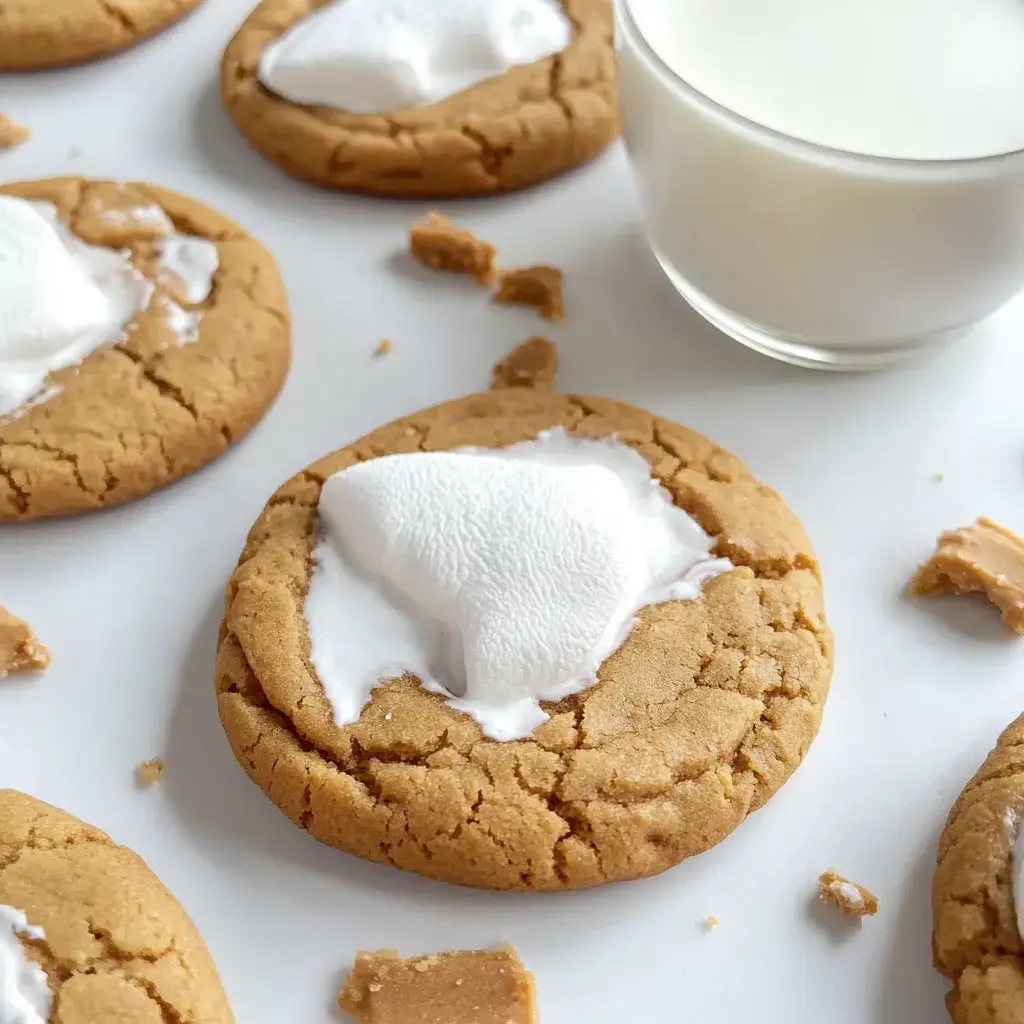
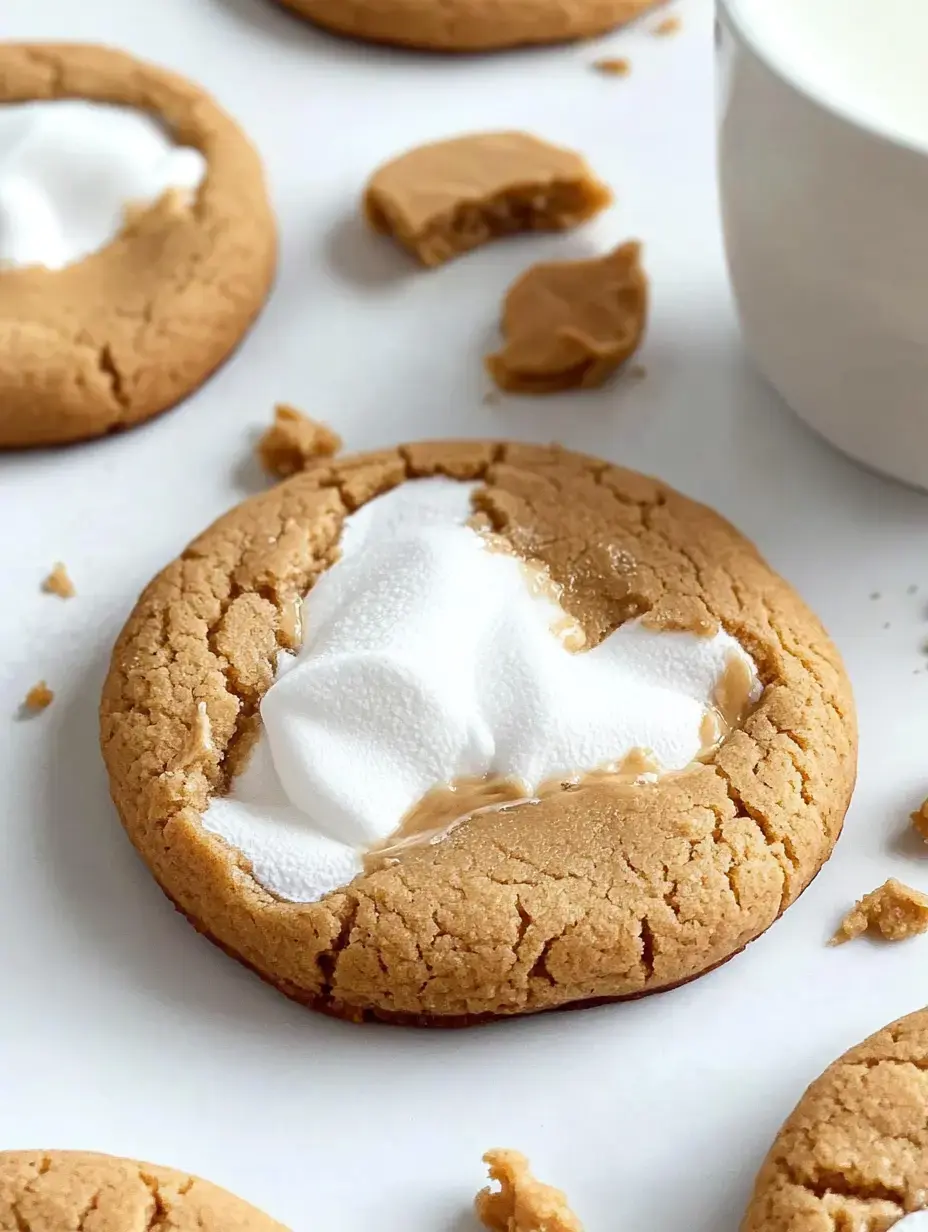
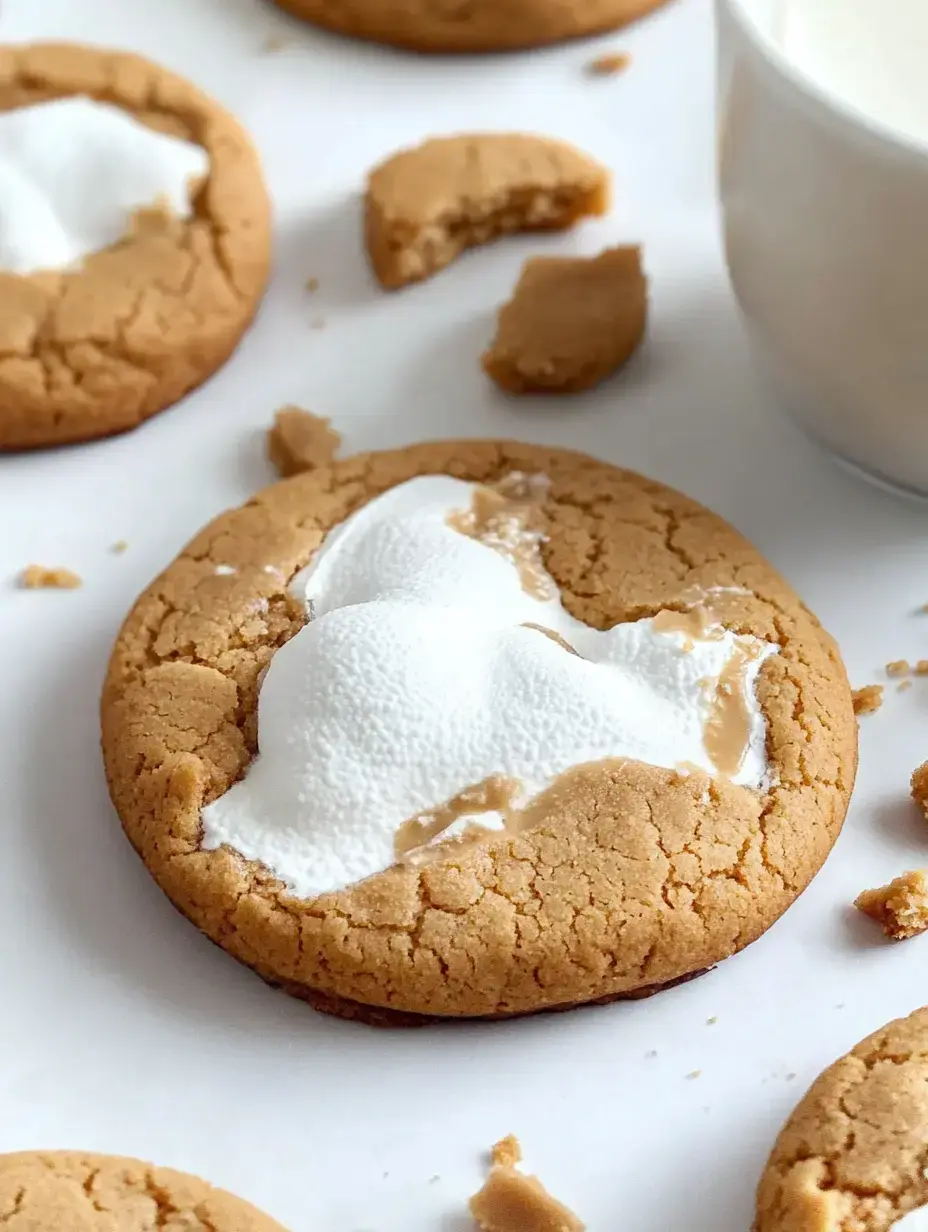
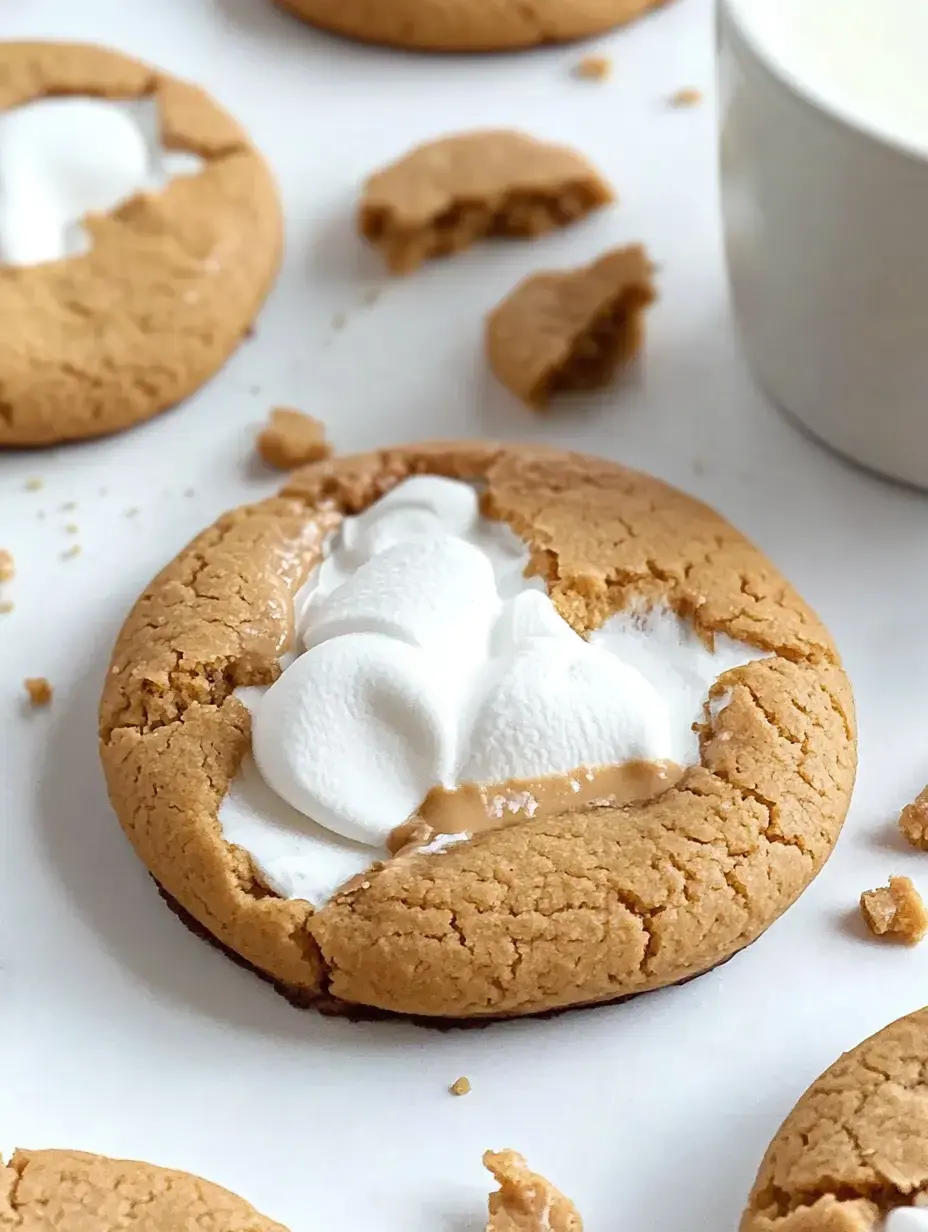
Ever since I fell in love with the peanut butter-marshmallow combo, these Fluffernutter Cookies have been my go-to treat. Honestly, you won't find softer, more tempting cookies anywhere. The chewy peanut butter base surrounds a gooey marshmallow center that'll blow your mind. I've whipped these up countless times, and they always vanish within minutes at family get-togethers.
Fluffernutter's Amazing Journey
As a kid in New England, I couldn't get enough of fluffernutter sandwiches for lunch. That dreamy mix of smooth peanut butter with marshmallow fluff on soft bread was heaven. While making sandwiches for my little ones one afternoon, it hit me. Why not turn my childhood favorite into cookies? After tons of kitchen experiments, I nailed this recipe at last.
Cookie Ingredients You'll Want
- Unsalted Butter: Make sure it's soft and sitting at room temp. I found this out after many batches went wrong.
- Creamy Peanut Butter: Don't go for the natural stuff here. Standard creamy peanut butter works way better.
- Granulated Sugar & Brown Sugar: Together they make cookies with the right bite.
- Egg: You'll only need one to bind everything nicely.
- Vanilla: Get the real extract for tastier cookies.
- Baking Powder & Baking Soda: They help your cookies puff up beautifully.
- Cornstarch: This is my hidden trick for super soft results.
- Marshmallow Cream: The hero that makes these cookies special.
Mixing Your Dry Stuff First
Find a medium bowl and throw in your flour, salt, cornstarch, baking powder and baking soda. I once thought this step wasn't worth it, but now I know better. Mixing these separately helps your cookies bake evenly throughout. That bit of cornstarch? It's my little secret for keeping cookies super soft.
Blending Butter and Peanut Butter
Here comes the fun part. Mix your softened butter with peanut butter until they're completely smooth together. I can't help sneaking a taste whenever I make this - it smells amazing. Just make sure you get it really smooth so your cookies turn out perfect every single time.
Adding Sweet Stuff and Wet Mix
Next, dump both sugars in and keep beating until it looks airy and light. It should seem almost whipped when you're done. Then add your egg and pour in the vanilla. I love watching it transform into this beautiful golden mixture that fills the kitchen with the most wonderful smell.
Putting Everything Together
Add your dry mix to the wet ingredients bit by bit. I usually do this three times, stirring just enough to blend everything. Your dough will end up thick and lovely. Stop mixing as soon as the flour disappears. I've learned that mixing too much ruins soft cookies.
Don't Skip the Cool Down
Stick your dough in the fridge for at least half an hour. Yeah, waiting sucks but trust me, it matters. Cold dough makes cookies that hold their shape and don't spread too thin. Sometimes I make my dough the evening before when I'm planning something special.
The Cookie Assembly Trick
Now for the best part. Take some dough, flatten it in your palm, and drop a spoonful of marshmallow cream in the center. Then carefully wrap the dough around it and seal it well. Your first few might look messy but you'll get better fast. I've done this so many times I could practically make them blindfolded.
Into the Hot Oven
Heat your oven to 350°F and put some parchment on your baking sheet. Place your cookie balls with plenty of space between them. They'll need about 10 minutes to bake. Look for slightly golden edges but make sure the middles stay soft. It's so hard not to grab one straight from the oven.
Let Them Rest Awhile
Keep the cookies on the hot baking sheet for 5 minutes before moving them. This step helps them stay together and keeps that gooey center perfect. I've messed up many batches by rushing this part. The extra minutes really do matter.
Handling Sticky Marshmallow
That marshmallow cream can get super sticky, but I've got a simple fix. Just keep some water nearby and wet your fingers before touching the cream. Makes everything so much easier. Also, make sure to completely seal the dough around it or you'll end up with a messy tray. I found that out the hard way.
Making Cookies Look Fancy
If your cookies come out looking a bit odd-shaped, no problem. While they're still warm, use a spatula to gently push the edges into a nice circle. I learned this trick from a bakery, and it makes homemade cookies look store-bought. Works like a charm every time.
Keeping Them Fresh
Store these goodies in an airtight container and they'll stay yummy for 3 days. Just don't stack them on top of each other. The marshmallow center makes them stick together. Though honestly, they rarely last more than a day at my place.
Save Some For Later
You can freeze these cookies for up to 2 months if you want. Just let them come to room temperature naturally when you're ready to eat them. They're perfect for when friends drop by unexpectedly or when you need a quick sweet fix.
Tasty Twists to Try
- Try Crunchy PB: I sometimes swap in crunchy peanut butter for extra texture. My kids absolutely love this version.
- Add Chocolate: Pour some melted chocolate over the top. After all, chocolate makes any dessert better.
- Make Them Allergy Safe: Sunflower butter works great instead of peanut butter if allergies are a concern.
Cookie Fun With Kids
My children always want to help make these treats. Let your kids roll the dough balls or add the marshmallow cream. Sure, your kitchen will get messy, but seeing how proud they are when the cookies come out makes the cleanup worthwhile.
Why Chilling Really Matters
The time in the fridge helps all those buttery ingredients firm up so your cookies stay shaped nicely. I've tried to rush and skip this step before, and while the cookies tasted fine, they spread out way too much. A little wait gives you much better results.
Things People Always Ask Me
Q: Can I use regular marshmallows instead?
A: You can use regular marshmallows in a pinch, but they won't give you that same gooey middle that cream does.
Q: Is chilling really necessary?
A: Absolutely. Don't skip it. Chilling is what takes these cookies from good to amazing.
Wrapping It Up
These Fluffernutter Cookies have become the treat I'm known for. That magical mix of peanut butter with marshmallow cream brings back my childhood memories while creating new ones. Try baking a batch yourself, and I bet they'll become a staple in your home too. Nothing feels better than sharing treats that make people smile.
Recipe FAQs
- → Why do you chill the dough beforehand?
- It keeps the cookies from flattening too much in the oven and makes stuffing with marshmallow cream easier.
- → Is crunchy peanut butter okay to use?
- Creamy peanut butter is better for this, but crunchy can be used if you'd like some added texture.
- → What's the best way to keep these fresh?
- Place them in an airtight container and leave at room temperature for up to 3 days. The marshmallow stays soft.
- → Can I freeze these for later?
- You could freeze unstuffed dough balls easily, but freezing the finished cookies isn't ideal as the filling changes texture.
- → What does the cornstarch do in this cookie batter?
- It makes the cookies softer and helps keep them from spreading out while baking.